
The Ultimate Short Hair Styling Guide (Pixie, Curls, Easy Styles & Tools)

If you’re wondering how to style short hair, you’re not alone. Short hair can be incredibly versatile once you know a few simple techniques. Some of the links in this article are affiliate links. This means I may earn a small commission if you purchase through them, at no extra cost to you. I only recommend tools and products that I personally use and genuinely like. Watch: How I Style My Short Hair In the video above you can see one of the easiest ways I style my short hair. Once the base is created, you can transform it into many different hairstyles over the next few days. How to Style Short Hair: Easy Hairstyles, Curls & Styling Tips Many people think short hair is limiting, but the opposite is true. Once you understand how to work with texture, shape and the right tools, styling short hair can actually be faster and easier than styling long hair. Over the years I’ve experimented with many ways to style my short hair. Some are quick everyday tricks, others create more polished looks. In this guide I’ll share the techniques that really make a difference. Why Short Hair Is Easier to Style Than You Think One of the biggest surprises after cutting my hair short was realizing that styling actually became much simpler. Before I had short hair, I assumed it would require constant effort to look good. But in reality, the opposite turned out to be true. Short hair often needs less time, fewer products and fewer complicated routines once you understand a few basic principles. Instead of relying on many styling products, short hair usually works best when you focus on a few key things: • creating texture • adding volume at the roots • working with your natural hair pattern • using the right styling tools When these elements come together, short hair becomes surprisingly versatile. Even small adjustments can completely change the final look. For example, a bit of root volume can instantly make a pixie cut look fuller. A slight twist or a hair accessory can turn a casual hairstyle into something more polished. And a textured styling base can make it possible to create multiple looks over several days without starting from scratch each morning. This is actually one of the reasons I love short hair so much. Instead of spending a lot of time styling every day, I usually create one base style that I can easily adjust or refresh for the next few days. Once you understand these basics, styling short hair becomes less about effort and more about small creative changes that make your haircut feel fresh again. How to Style Short Hair with an Easy Twist Technique Short hair can be styled in many different ways without needing much time. Often it’s the small details that make the biggest difference. Simple techniques like twisting sections of hair, adding a hairband or slightly changing your part can completely transform your look. Because short hair is lighter and easier to shape, even quick styling tricks can have a big visual impact. This makes it perfect for busy mornings when you want your hair to look styled but don’t want to spend a lot of time in front of the mirror. One of my favorite approaches is creating a versatile styling base and then turning it into different hairstyles over the following days. With a bit of texture, short hair becomes much easier to work with and holds styles better. If you’re looking for quick styling ideas, I shared some of my favorite ones here: → 8 Twisted Hairstyles for Short Hair These styles only take a few minutes and are perfect for everyday wear, work, special occasions or simply days when you want something simple but still polished. They also show how versatile short hair can be once you start experimenting with small styling techniques. How to Style Short Hair with Curls One of the easiest ways to add movement, volume and versatility to short hair is by creating curls. Many people think curls are harder to achieve on short hair, but in reality they can be much easier and faster than styling long hair. The key is choosing the right technique and tool for your hair length. Depending on your hair type and the look you want to create, curls can be made with a curling iron, a straightener, or by enhancing your natural waves. Personally, I often create curls with a straightener, because it allows me to control the shape of the curl while also smoothing the hair at the same time. What I love most about this method is that it creates a styling base. Once the curls are in place, I usually don’t need to restyle my hair every day. Instead, I can use the textured base for different hairstyles over the next few days until my next wash day. That’s exactly what I show in more detail here: → Curly Base: 8 Elegant Hairstyles for Short Hair In that guide I walk through the exact technique I use to create the curls with a straightener and then transform the same base into multiple hairstyles. From elegant hairband styles to simple twisted looks, the curls make short hair much easier to work with. For me, this is one of the biggest advantages of short hair: with one simple styling base you can create many different looks without starting from scratch every morning. Curls truly are one of the easiest ways to make short hair feel more versatile, structured and full of life. Curly Girl Method for Short Hair Many people with short hair actually have natural waves or curls without realizing it. If your hair often feels frizzy, puffy or unpredictable, it might simply be your natural curl pattern trying to show up. This is especially common with shorter haircuts because the natural texture becomes more visible once the hair isn’t weighed down by length. A routine inspired by the
Short Hair Curl Routine – Bali Curls Products for Long-Lasting Curls
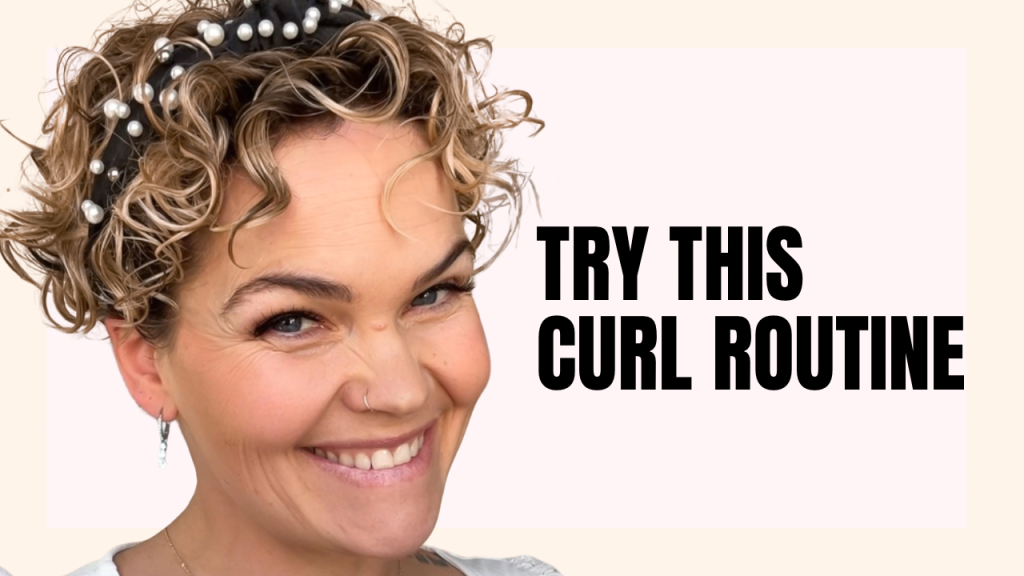
Short Hair Curl Routine – Bali Curls Method for Long-Lasting Curls For a long time I thought my short hair was just slightly wavy. No real curls, just a bit of texture. But once I started treating my hair like curly hair, something surprising happened: the curls were already there — they were just hidden. With the right routine and the right products, waves can turn into defined curls. In this article I show you my short hair curl routine using the Bali Curls products, the same routine you see in the video above. This routine helps create defined curls that last for several days, even on short hairstyles like pixie cuts or layered short hair. Products Used in This Video Many people coming from the video simply want to know which products I used, so here they are. To create these curls I used the following products from the Bali Curls line, which are designed to hydrate curly hair while keeping it lightweight and defined. Bali Curls Set-> get it here For drying and diffusing my hair I used: • Laifen Hair Dryer with Diffuser-> get it here You can read my full review of the hair dryer here: → Laifen Hair Dryer Review Below I explain the full short hair curl routine step by step, so you can recreate the curls at home. Some of the links in this article are affiliate links.This means that if you purchase through these links, I may earn a small commission at no extra cost to you. I only recommend products that I personally use and genuinely like. My Short Hair Curl Routine (Step by Step) This short hair curl routine focuses on three important things: • moisture • curl definition • long-lasting hold Short hair often needs lighter products, but it still needs enough hydration for curls to form properly. 1. Start With a Clean Scalp The first step of this short hair curl routine is washing the hair properly. When starting a curly hair routine or trying new products, it can help to shampoo twice during the first few washes. This removes product buildup that can prevent curls from forming. After the first washes I usually shampoo only once. The goal is a clean scalp without heavy residue. 2. Optional: Use a Deep Repair Mask Curly hair usually needs more moisture than straight hair. Every few washes I apply the Bali Curls Deep Repair Mask to restore hydration and softness. I usually use a hair mask every 2–4 washes, depending on how dry my hair feels. 3. Apply Conditioner After the mask (or after shampooing), I apply conditioner to very wet hair. Conditioner smooths the hair cuticle and prepares the hair for styling products. Important tip: Keep your hair very wet before styling. Water helps curls form more easily. 4. Apply Curl Cream Now the styling part of the short hair curl routine begins. I apply the Bali Curls Curl Cream into my wet hair and gently scrunch the hair upward. Scrunching helps activate the natural curl pattern. At this stage I already shape the hair roughly the way I want to wear it. 5. Add Curl Gel for Hold Next I apply curl gel. Gel helps create the famous gel cast, which keeps the curl shape while drying. Sometimes I mix a little curl cream into the gel to keep the curls soft while still getting good hold. → Curl Gel here Then I scrunch the hair again to activate the curls. 6. Diffuse the Hair To dry my hair I use a hair dryer with a diffuser attachment. Diffusing helps: • reduce frizz • keep curl definition • add volume to short hair I dry the hair until it is completely dry before touching it. If you’re curious about the hair dryer I use, you can read my full review here: → Laifen Hair Dryer Review 7. Scrunch Out the Gel Cast Once the hair is completely dry, the curls may feel slightly stiff. This is called the gel cast, which protects the curl shape while drying. To soften the curls, I apply a small amount of Bali Curls Hair Oil and gently scrunch the hair again. → Hair Oil here in a set with the Curl Cream and Gel for a special price This breaks the cast and reveals soft, defined curls. How Long Do These Curls Last? With this short hair curl routine my curls usually last 4–5 days. In the morning I simply refresh them by: • lightly misting water • or using a curl refresh spray Then I scrunch the hair again and the curls come back to life. Does the Curly Girl Method Work on Short Hair? Yes — absolutely. Many curly hair tutorials focus on long hair, but the curly girl method works beautifully on short hair. It works especially well for: • pixie cuts • short layered hairstyles • short bobs • undercut styles Short hair can actually look even fuller and more voluminous when curls are defined properly. What If Your Hair Doesn’t Curl Naturally? Not everyone has natural curls. If your hair stays straight or only slightly wavy, you can still create beautiful curls using styling tools. I wrote another guide showing 8 elegant short hairstyles created with a straightener, which works perfectly for short hair. → Read the article here: 8 Elegant Short Hairstyles With Curls Using a Straightener Growing Out My Undercut If you follow my content, you might know that I used to wear an undercut hairstyle. Right now I am growing out my undercut, which sometimes makes styling a little more challenging. If you are in the same situation, this guide might help you: → Growing Out an Undercut at 40 – My Honest Start Final Thoughts Many people believe their hair is simply straight or slightly wavy. But very often the curls are just hidden under the wrong routine. With the right products, enough moisture and the correct styling technique, you might discover that
My Everyday Short Hair Tools & Products I Actually Use
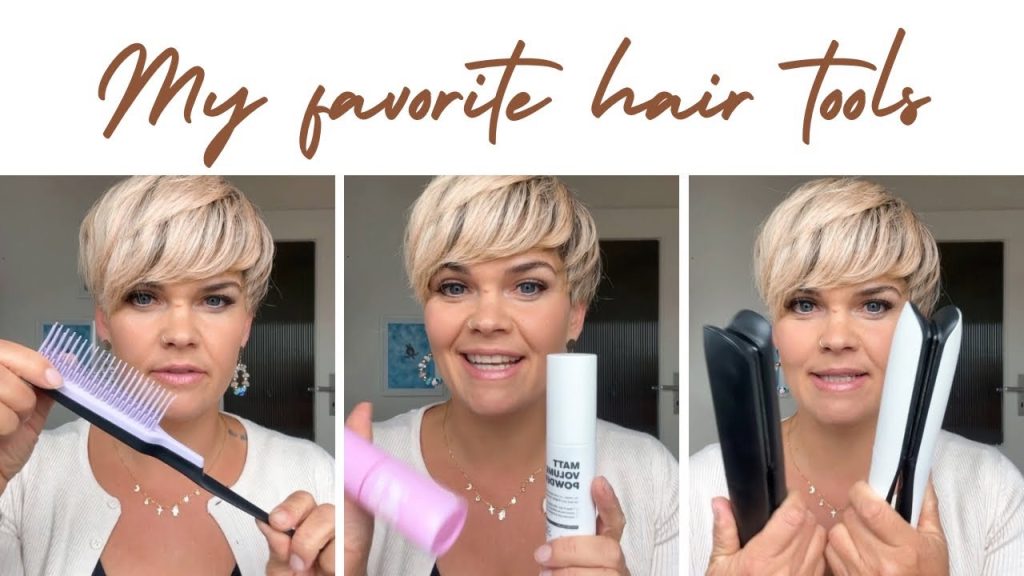
My Everyday Short Hair Tools & Products I Actually Use If you have short hair, you know: The right tools make everything easier. In this post, I’m sharing all the products and styling tools I truly use every single day — from affordable mini straighteners to professional flat irons and my favorite heat protection products. Nothing sponsored. Nothing just for the camera. Only what actually lives in my bathroom. If you prefer watching, you can see everything in action in my full YouTube video. Below, I’ll break it down clearly and simply. This article contains affiliate links. If you purchase through them, I may earn a small commission at no extra cost to you. I only recommend products I personally use and genuinely find helpful. 1. The €10 Mini Straightener (Perfect for Short Hair & Undercuts) This little straightener is such a hidden gem. For very short sections, undercuts, or quick detail work, it’s incredibly practical. Because it’s narrow and lightweight, you can get close to the roots without burning yourself. However, it’s important to understand the difference between a simple flat iron and a true styler. A real styler has plates that are as wide as the body of the tool. This allows you to create round curls and versatile styles — not just straighten the hair. When the plates are narrower than the body, the result is usually more angular waves instead of soft curls. I explain this difference in detail in this article 👉 Ideal for: Pixie cuts Growing out an undercut Quick travel styling Touch-ups during the day 🔗 Mini straightener Sadly the cloud nine one is not available anymore. 2. Heat Protection – What I Use & Why Heat protection is non-negotiable for me. I switch between different products depending on how I style my hair. Heat Protection Balm (for straightening) This one is perfect if you prefer natural cosmetics. It smooths the hair without feeling heavy and works beautifully when using a flat iron. 🔗 Natural heat protection balm If you use conventional products here is my favorite from ghd. It gives structure and keeps the hair soft without weighing it down. 🔗 ghd Heat Protection Balm Heat Protection Spray (for curls & texture) When I style waves or curls, I prefer a lighter spray. It keeps movement in the hair and works better with volume. 🔗 Heat Protection Spray 3. Volume Powder (and My DIY Alternative) Short hair needs lift at the roots. I love volume powder because: It gives instant grip Makes styling easier Adds fullness in seconds 🔗 Volume powder I also share a simple DIY alternative in my video if you prefer something minimal and budget-friendly. If you’d like a deeper step-by-step explanation of my DIY texture and volume methods for short hair, I’ve included them in my book Styling Short Hair Made Easy. You can read more about it here 4. Tangle Teezer Comb This comb is gentle but effective. Especially for short layers, it helps distribute product evenly without pulling. 🔗 Tangle Teezer comb 5. Silicone Hair Clips for Sectioning These are such an underrated tool. Because of the silicone band, they don’t slip — even in very fine or short hair. Perfect for: Sectioning while blow-drying Styling with a flat iron Keeping hair controlled during makeup 🔗 Sectioning clips 6. My ghd Styling Tools – And How I Choose Between Them When it comes to flat irons, I don’t use just one blindly. I choose depending on the result I want. Over the years, I’ve tested several models in real everyday use — especially on short hair. And two of them stayed. But before I explain the difference, I want to say this: If you’re unsure which ghd model is right for you, I’ve written a full in-depth comparison where I break everything down clearly: 👉 Read my complete ghd comparison here That article goes much deeper into: plate technology heat control damage prevention performance differences and which one is best for short hair Now here’s how I personally use them: ghd Gold – My Everyday Styler This is the one I reach for most often. Why? Reliable Smooth glide Great for soft waves Perfect for quick, everyday styling For short hair, it gives enough control without feeling “too aggressive.” It’s simple, consistent, and does exactly what I need. 🔗 ghd Gold Styler ghd Platinum+ – When I Want a More Polished Finish I use this when I want: extra smoothness long-lasting hold a more refined result It feels slightly more advanced and controlled, especially when I want a very sleek look. 🔗 ghd Platinum+ Quick Decision Help If you just want: Easy everyday styling → Gold Maximum polish & control → Platinum+ But again — if you’re investing in a ghd tool, I highly recommend reading my full comparison first. I also break down the ghd Chronos there and explain how it differs from Gold and Platinum+, so you can make a confident decision. 👉 Full comparison guide here 7. My Blow Dryers I do have 2 favorite all time hair dryers, both from Laifen. I use the Laifen Mini when I blow dryer my hair before straightening. It’s lightweight and small so I also take it on travels. But for natural Curls my daughter and I prefer the normal Laifen Blow Dryer, as it comes with an diffusor which is essential for our Curly Girl Routine. If you want to bring out your hidden curls check the full routine here. Why the Right Short Hair Tools Matter With short hair, there’s less room for mistakes. The right tool: Saves time Prevents damage Makes styling easier Creates more volume Gives control You don’t need 20 products. But the few you use should really work. Watch Everything in Action If you want to see how I use each product in real life, you can watch my Videos here: 👉 YouTube.com/salirasa Let’s Connect You can also find more short hair inspiration here: Instagram: instagram.com/salirasa Facebook: facebook.com/salirasastyle My
Laifen Mini vs. Laifen Hair Dryer
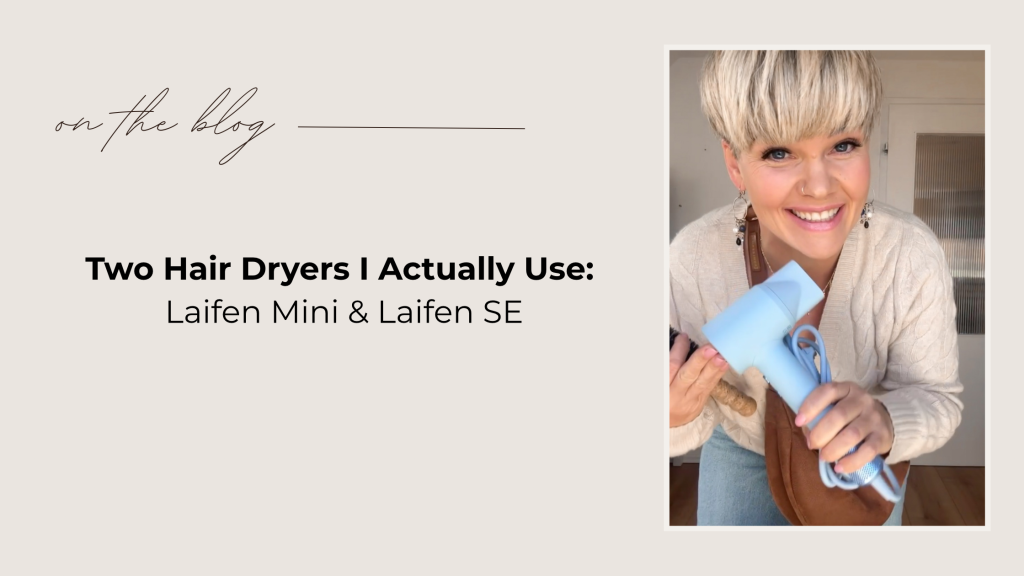
Laifen Mini vs. Laifen Hair Dryer https://youtube.com/shorts/Jk8LR1GLKRE?si=skUzAIBJ463ccVDr In this video, I explain the key differences between the Laifen Mini and the Laifen SE from a short hair perspective. Which hair dryer actually makes sense for short hair? If you have short hair, you already know this: Styling doesn’t start with a styler or a flat iron. It starts with the blow-dry. With short hair, the direction, volume and texture are decided early. That’s why choosing the right hair dryer matters much more than many people think. I’ve been using both the Laifen SE and the Laifen Mini, and in this article I want to answer one honest question: Which Laifen hair dryer actually makes sense for short hair – and when is the Mini enough? Laifen SE Laifen Mini Why blow-drying is so important for short hair With long hair, a lot can be corrected later. With short hair, it can’t. The blow-dry determines: where volume sits how the hair falls whether the style looks soft or stiff how easy it is to restyle the next day That’s why I pay close attention to control, airflow and comfort, not just power. Laifen at a glance: NEO vs. Mini Laifen currently offers two models that are relevant for everyday use: Laifen – the full-size, standard version* Laifen Mini – the compact, lightweight alternative* What both Laifen dryers have in common Before looking at the differences, there are a few things that apply to both models: noticeably lightweight strong but controlled airflow quieter than many traditional hair dryers fast drying without feeling harsh clean, minimal design They fit well into a minimalist approach: one good tool instead of many average ones. Laifen Mini – when less really is more The Laifen Mini stands out because of its handling. Why the Mini works so well for very short hair: extremely lightweight easy to maneuver close to the scalp great control around the hairline comfortable for quick daily styling ideal for travel or small bathrooms If you wear: a pixie cut an undercut very short layers the Mini feels intuitive and precise. The Mini is a good choice if: your hair is short all over you value control over speed you don’t need to dry thick or long lengths you want a compact, simple tool For many short hairstyles, the Mini is completely sufficient. Laifen NEO – the more flexible long-term option The regular Laifen is the full-size version and offers more airflow and versatility. This becomes noticeable if: your hair is thicker you have more length on top you are growing out an undercut you want faster drying overall You have curly hair Why the regular sized Laifen makes sense: stronger airflow faster drying time still lightweight and well balanced suitable for changing hair lengths If your hair is in a transition phase, the regular Laifen often feels like the safer long-term choice. A note on curly hair and the diffuser At home, we don’t only have short hair. I have natural curls which you can see in this Video where I demonstrate the Curly Girl Method with Bali Curls Products My daughter has long, naturally curly hair, and she prefers the regular Laifen mainly because it comes with a diffuser. For curly hair, the diffuser is essential: curls stay more defined airflow is gentler less frizz better curl pattern overall While the Mini and the normal sized both work well for short hair, the normal size clearly makes more sense when curls and length are involved. This is a good reminder that the right hair dryer depends on hair type, not trends. Laifen Mini vs Laifen – a simple decision guide Choose the Laifen Mini if: your hair is very short you want maximum control you style close to the scalp you travel often you prefer the lightest possible tool → View Laifen Mini here* Choose the Laifen SE if: your hair is short but thick you are growing it out you want faster drying you need a diffuser for curls more than one person uses the dryer → View Laifen normal size here* There is no better or worse – only what fits your current hair and lifestyle. About product links On my blog, I only link tools we actually use. If you see product links in this article, they are there to help you find the exact models I’m talking about – not to push unnecessary purchases. You don’t need many tools. But choosing one that truly fits makes everyday styling much easier. Final thoughts A mini hair dryer isn’t automatically better for short hair. And a full-size dryer isn’t automatically too much. What really matters is: how it feels in your hand how much control you have how well it supports your daily routine For us, different hair lengths mean different tools – and that’s completely fine. If you’re unsure which Laifen dryer makes sense for you, ask yourself: Do I need more control – or more versatility? That answer usually makes the decision very clear.
8 Elegant Styling Ideas for Short Hair
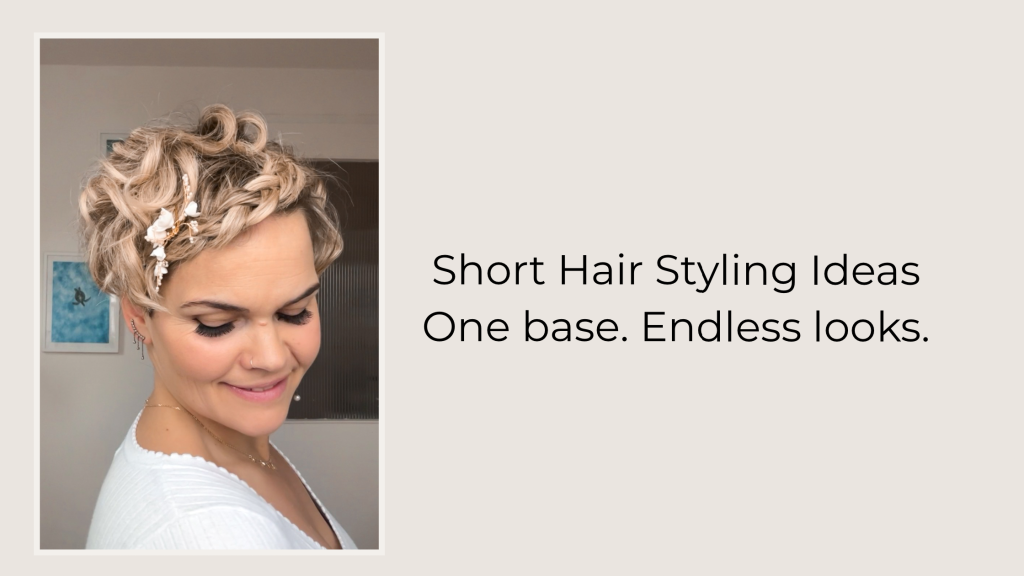
8 Elegant Styling Ideas for Short Hair Short hair can feel tricky when you’re growing out an undercut. Some days it feels too short for “real” hairstyles — and too long to just leave it undone. In this post, I’ll show you one simple curling base and 8 elegant styling ideas for short hair you can create from it — using accessories, small twists, and braiding techniques that work beautifully on short hair. All styles are shown on real short hair with a growing-out undercut and are designed to be wearable, adaptable, and realistic. This guide is for anyone looking for styling ideas for short hair while growing out an undercut — practical, elegant and realistic. Note: Some links in this post are affiliate links. This helps support my work without any additional cost for you. You can also watch the full video tutorial here, where I show every step in real time: The Base: Soft Curls for Short Hair Before I show you all the different styling ideas, let’s talk about the base. Because this entire post – and the video – is built on one simple curly foundation that you can wear for several days and restyle again and again. I create this base by curling my short hair evenly all over. Not to finish the look – but to create movement, grip and flexibility. This way, the hair already has structure, which makes every styling idea easier, faster and longer-lasting. For the base, I always use a heat protection spray to protect my hair before styling. You’ll find the exact one I use – as well as similar alternatives for short hair – linked below. Why the Right Tool Matters: Flat Iron vs. Styler At the beginning of the video, I intentionally show two different mini flat irons – because not every tool that looks similar works the same way. The key difference is the width of the plates AND the body. A true styler has plates that are as wide as the tool itself. This allows the hair to wrap naturally around the iron and creates round, soft curls. Some mini flat irons – like the ghd mini – have narrow plates that are slimmer than the body of the iron. These are excellent for straightening or precision work, but they tend to create angular bends instead of round curls. That’s why, for a versatile curly base, I personally always recommend choosing a tool where: the plates are as wide as the iron itself the hair can glide smoothly around the shape curls stay soft, flexible and natural This one decision makes a huge difference – especially with short hair. If you’re mainly looking to create curls, waves and flexible bases for short hair, a true styler will give you much more control and versatility. My current styler for short hair All the styling ideas below are created on this exact base – the curls stay the same, only the accessories and techniques change. 1. Pearl & Flower Headband (Elegant Occasion Style) For special occasions like weddings or formal events, I use a slim headband with pearls and flowers. I tie it at the back and softly place a few curled strands around it to frame the face. It looks elegant without overpowering short hair. Pearl Headband 2. DIY Pearl Hair Accessories (Handmade Look) This is one of my favorite ideas. I thread small transparent elastics through pearls, loop the elastic back around the pearl, and instantly create custom pearl hair accessories. I place around 5–6 pearls at different spots in my hair to gently accent the curls. 👉 Get the Pearls here and here the clear elastics 3. Colorful Twisted Scarf I take a colorful scarf and twist it tightly so it becomes slim. Then I tie it from back to front around my head, with the knot placed slightly off-center. This works beautifully with curls and instantly adds personality. 👉 Similar scarfs here 4. Front Dutch Braid with Shine & Volume I refresh my curls using a final shine spray, then create a small Dutch braid only with my front section. I braid from one side to the other, crossing the outer strands under the middle and adding hair as I go. At the end: I fix it on the opposite side with volume powder(or a small elastic if your hair is slippery) Optional: Add a decorative pearl hair comb at the end of the braidInsert it by pushing it forward first, then flipping it back to lock it in place. You can gently pull the braid apart to add volume. 👉 Shine spray and Volume Powder 👉 Pearl hair comb If you’re new to techniques like twisting, soft braids or working with short layers, I explain these basics in more detail in my short hair styling book. It’s available in English and German and can also be read for free with Kindle Unlimited. 5. The Evergreen Headband with Clips (Works Every Time) This is one of those techniques that never really disappears – and for good reason. The headband with clips is incredibly practical for short hair, especially when layers are uneven or growing out. I place the headband on my head and then take individual strands from the front, laying them over the band and clipping them in place one by one. Because the hair is already curled, this works beautifully and looks soft rather than structured. It’s a great option for days when you want your hair out of your face without pulling everything back. What I like most about this technique is its flexibility. You can keep it very subtle for everyday wear or build it up with more volume and texture for a more styled look. 👉 Headband with clips 6. Pearl Hair Chain Twist This style looks intricate but is very simple. I take a pearl hair chain with a clip and place it into my front section. Using two strands, I twist them together — one strand
3 Must-Have Hair Styling Essentials for Short Hair ( 2 Tools + One Easy Hack)
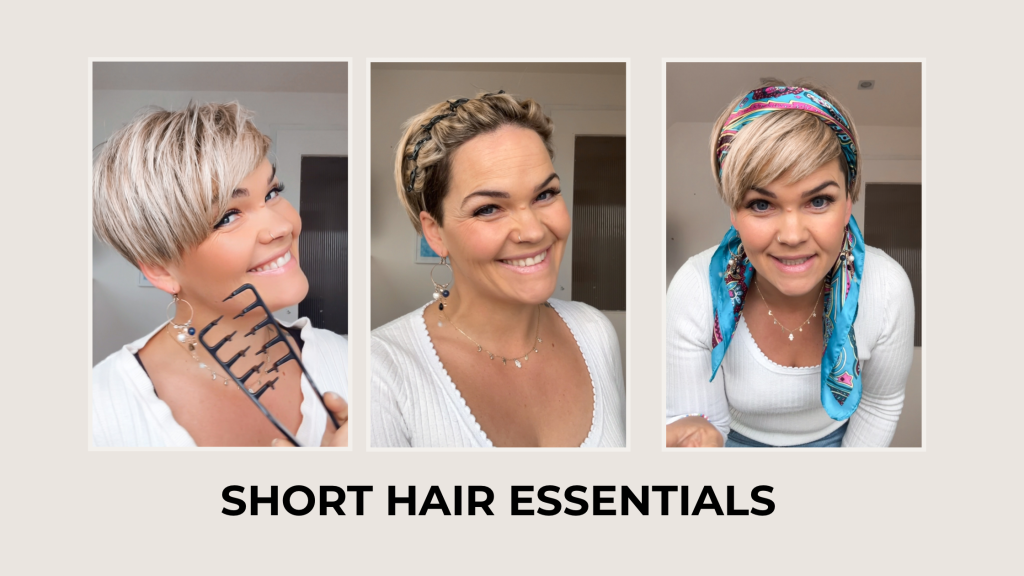
3 Must-Have Hair Styling Tools for Short Hair ( 2 Tools + One Easy Hack) I didn’t expect much from short hair styling tools, Some look gimmicky, some feel unnecessary. But a few of them genuinely surprised me – especially on short hair. In this post, I´m sharing two viral hair tools that actually work on short hair – and one simple hair hack that doesn’t require buying anything new. When I say styling essentials, I don’t mean more products. I mean the few things that actually make simple styling possible: One tool that creates lift – one tool that keeps styles in place – and one technique that gives you control without buying anything new. This post contains affiliate links. I only recommend products I genuinely use or trust. If you like to watch instead of read, here´s the full video where I show all three essentials step by step on short hair: Short hair doesn’t need drawers full of products. It needs a few reliable styling essentials that actually work in real life. In this guide (and video), I´m sharing two short hair styling tools I genuinely use – and one styling hack that dont require buying anything at all. The New Volume Comb – My Go-To-Tool for Texture & Lift I’ll be completely honest: I thought this comb was pointless. It’s one of those viral volume combs that are everywhere right now, and I assumed it would look impressive on social media but do very little in real life – especially on short hair. That’s exactly why I tested it with low expectations – And it genuinely surprised me.Its one of those short hair styling tools that actually work. Used on dry hair, it creates lift right at the roots – the area where short hair tends to fall flat the fastest. No teasing. No heavy products. No stiff or sticky feeling. Just a small, controlled boost that you can place exactly where you need it. It’s not a miracle tool and it won’t replace good styling technique. But as a quick, simple way to add volume to short hair, this viral comb actually works. And that’s why I keep using it. >You can find the volume comb I tested here< The Viral Hairband with Clips – A Simple Tool That’s Been Working for Years This one isn’t new – and that’s exactly why I trust it. The hairband with clips has been around for years, and every time I show it, people buy it again. Not because it’s trendy or particularly beautiful, but because it simply works – without any skill required. You don’t need to know how to style your hair. You don’t need volume tricks or tutorials. You just clip it in, and it looks like an intentional hairstyle. That’s what makes it so practical, especially in summer. It keeps hair out of your face, feels light, and works on both short and long hair. Whether your hair is freshly washed or not – it still looks put together. It’s not a high-end accessory, and it doesn’t pretend to be one. But it’s affordable (usually under 10 euros), accessible to everyone, and does exactly what it’s supposed to do. And sometimes, that’s all a hair tool needs to do. >You can find the hairband with clips I’ve been using here< A Viral Hairband Hack – No Tool Needed, Just a Scarf This last one isn’t a tool – it’s a hack. All you need is a medium-sized scarf. Silk works beautifully, but honestly, anything you already have will do. Using a simple knotting technique (I show it in the video), you create a middle loop, hold it, give it a quick shake – and suddenly you have an adjustable hairband. You put it on, tighten it exactly the way you want, style it slightly if needed – and that’s it. No slipping, no pulling, and no need to buy anything new. That’s why this hack keeps getting so much attention: it’s flexible, works on short and long hair, and uses things most of us already have at home. Of course, this won’t work the same way for everyone. Some hair types are naturally more slippery, and some head shapes make certain styles harder to keep in place. If that’s the case for you, this might need a bit of adjusting – or it simply might not be your thing. And that’s okay Tip: slightly textured hair (not freshly washed) usually holds these styles better. If you need a little extra grip, I share my favorite Texture products in this guide. My Everyday Short Hair Tools & Products I Actually Use Not every viral hair trend is worth following. But sometimes, simple things really do make everyday hair easier – especially with short hair. Whether it’s a tool that genuinely surprised me, a hairband that has proven itself for years, or a hack that doesn’t require buying anything new, all three have one thing in common: they work without effort. No complicated techniques. No pressure to be perfect. Just practical solutions that make styling feel lighter. And honestly, that’s exactly what I value most. Some of the links in this post are affiliate links. This means I may earn a small commission if you choose to purchase through them – at no extra cost to you. I only share tools and ideas I’ve personally tested or genuinely find helpful. You may also like: • My Favorite Short Hair Styling Tools and Products • How I Create Long-Lasting Curls on Short Hair • Curly Girl Method for Short Hair
Winter Hair Care for Short Hair
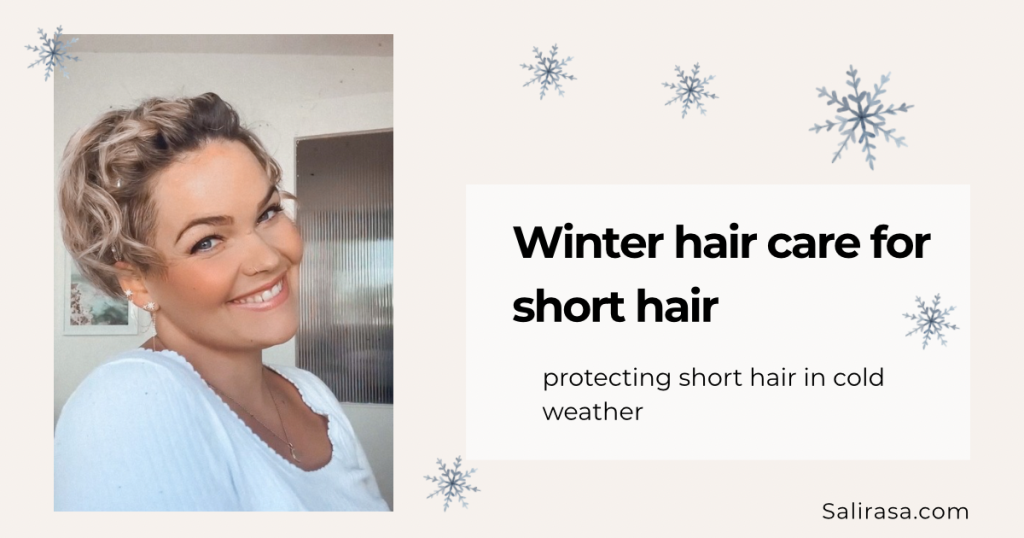
Winter Hair Care for Short Hair How to Protect, Style and Keep Short Hair Healthy in Cold Weather Winter can be beautiful — but for short hair, it can be a real challenge. Cold air, dry heating, hats, scarves and constant temperature changes can quickly lead to: dryness, frizz, static hair, dull texture, and hair that just won’t sit right The good news? With the right care, protection and a few smart habits, short hair can look amazing all winter long — with and without a hat. 🎥 Watch First: My Winter Hair Care Video for Short Hair If you prefer seeing things in action, I’ve created a video where I show how I care for and protect my short hair during winter, including styling tips that actually work in cold weather. Watching the video first will give you a quick overview — and the tips below will help you go deeper. Why Winter Is Hard on Short Hair (And Why Hair Care Starts Inside Your Body- this post contains affiliate links marked with an *) Before we talk about products, hats or styling tricks, let’s start with something important: Healthy hair doesn’t start in your bathroom — it starts inside your body. Our hair is literally made by our body. And in winter, our body is under more stress than we often realize. Cold air outside, dry heating inside, less daylight, less movement — all of that affects: our skin our scalp and yes, our hair Short hair has less natural protection than long hair, which makes these effects even more noticeable. Especially in winter: cold air dries hair out faster heated indoor air pulls moisture from hair and scalp friction from hats and scarves roughens the hair cuticle frequent styling to “fix” flat or frizzy hair adds extra stress That’s why winter hair care for short hair needs a slightly different — and gentler — approach. The Real Foundation: Nutrition & Hydration for Healthy Hair I know this isn’t the most exciting topic — but it’s the most important one. If your body is dehydrated or missing nutrients, no product in the world can fully fix that. In winter especially, many of us: drink less water eat more comfort food eat fewer fresh foods don’t notice dehydration because we sweat less But your hair still needs: water healthy fats minerals and enough protein Simple reminders I give myself (and now you ): drink regularly, even if you’re not thirsty include healthy fats (nuts, seeds, olive oil) eat fiber-rich, nourishing foods don’t underestimate warm drinks (tea counts!) Think of it like this: Your hair care routine works best when your body is supported from the inside. 1. Moisture Is Everything (But Without Weighing Short Hair Down) In winter, short hair doesn’t need more products — it needs the right ones. Especially for fine or short hair, balance is key. Focus on: lightweight leave-in moisture protective oils or balms (used very sparingly) avoiding alcohol-heavy styling products With short hair, a tiny amount really is enough. Too much product in winter often leads to: flat hair greasy roots less movement Healthy winter hair should feel: soft flexible protected — not coated 2. My DIY Hair Wax Recipe (A Winter Protection Favorite) One of my personal winter essentials is a simple DIY hair wax. I originally created it because I wanted something that: protects hair from drying out seals in moisture reduces friction from hats adds soft definition without stiffness In winter, this kind of wax is especially helpful because it: sits on the hair like a light protective layer prevents moisture loss keeps short hair flexible instead of brittle I use it sparingly — just a little goes a long way. Ingredients (You can adjust this recipe depending on your hair type – see notes below) 30 g Shea Butter* → deeply nourishing, protects hair from cold and dry air 7 g Coconut Oil* → adds softness and moisture (optional for very dry hair) 2 g Olive Oil* → smooths the hair cuticle and adds shine 8 g Beeswax* → gives structure, hold and creates a protective barrier How I Use It I melt all ingredients gently using a water bath, mix them well and let the wax cool completely. A tiny amount is enough — I warm it between my fingers and lightly work it into dry hair, especially on the ends or areas exposed to hats. Important Notes (Please Read 🤍) My hair is not your hair. If your hair is not very dry, you can leave out the coconut oil and olive oil. If you want a stronger hold, simply add a little more beeswax. This wax is meant to protect, not to replace styling products. The beauty of this recipe is that you can easily adapt it to your own hair needs. Why This Works So Well in Winter protects hair from cold air and indoor heating reduces friction from hats and scarves prevents moisture loss adds soft definition without weighing short hair down This is especially helpful for short hair in winter, where dryness and friction are often the biggest issues. It’s natural, budget-friendly and perfect for short hair in cold weather. 3. Hats, Beanies & Friction — Let’s Be Honest Let’s talk about hats. Hats and beanies will always create friction. There’s no way around that. Especially if the inside of the hat is: rough synthetic poorly finished Friction can: raise the hair cuticle cause dryness and frizz make short hair lose definition faster And yes — technically, a silk scarf under a hat would protect your hair perfectly. But let’s be real Most of us don’t want to walk around in winter wearing a silk headscarf under a beanie. We want to: stay warm, look good, feel comfortable, and still like our hair when the hat comes off So instead of fighting reality, we adapt — smartly and realistically. 4. The One Place Where Protection Really Matters: Your Pillowcase Here’s a winter hair
8 Twist Hairstyles for Short Hair – One Technique, Endless Looks
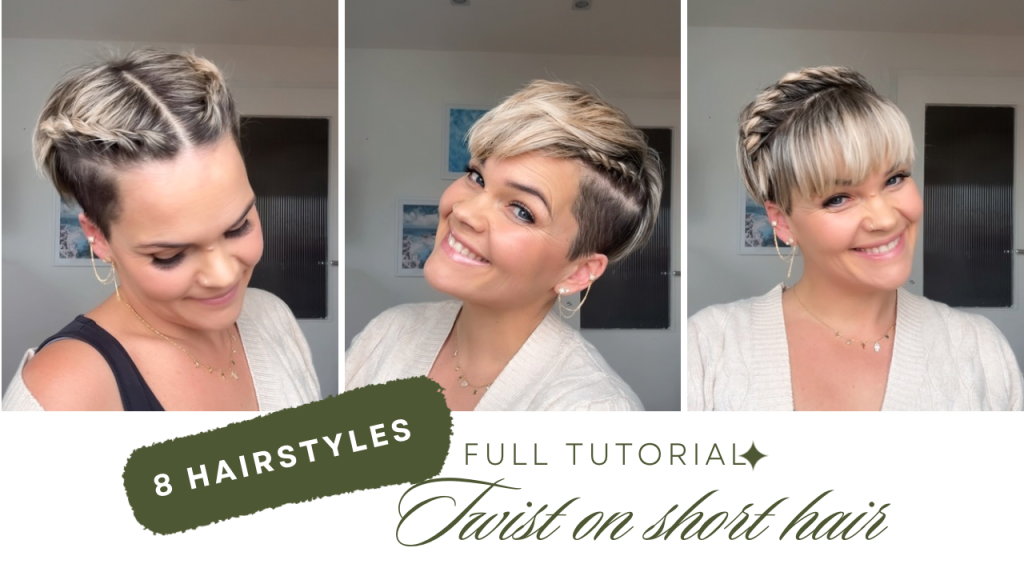
In this post, I’m sharing 8 different twist hairstyles for short hair, all based on the same move. Some of the tutorials are shared via YouTube and Facebook, where I can earn revenue from views. Watching the videos there directly supports my work — thank you for that. https://youtu.be/IcxGa7S9Ou4?si=eo2dF4nirw_hRlsA 1. The Twist All Around (The Base) This is the foundation of all twist hairstyles in this series. The twist all around works on pixie cuts, undercuts, and grown-out short hair and creates instant structure without heat or cutting. In this tutorial, I show you: how to place the twist evenly around the head how tight or loose it should be for different hair types how to secure it so it lasts all day how to adapt the twist if your hair is very short or already grown out I also share styling tips and product recommendations that make this technique easier and longer-lasting — especially helpful if your hair is fine or slippery. This is the key tutorial to understand the twist before trying the other styles. In this base twist I also share my favorite styling tips and products I use. Products I use for twist: (Affiliate links – if you purchase through my link I earn a small commission, thank you for your support) texturizing volume powder for grip small hair pins / bobby pins clear elastics These products help the twist hold better and add definition without weighing short hair down. If you want more volume before twisting, I explain my favorite short hair tools and techniques here (click to read) 2.One Side Twist (Undercut Highlight) This twist is perfect if you want to highlight your undercut or create an asymmetrical look. If you are growing out an undercut or maintaining one at home, this guide might help (Click to read) By twisting only one side: the undercut becomes the focus the style looks edgy but still feminine it works great for pixie cuts with shaved sides This look is ideal for: bold short hair styles growing out an undercut adding definition without cutting Watch this in the full Video (Timestamp 01:42) 3.Double Side Twist (Fierce Mohawk Vibe) This style gives serious mohawk energy without shaving anything. The double side twist: creates height in the center looks strong, confident, and modern works beautifully on thick and fine hair Perfect if you want a statement look that still feels wearable. If you want to make your own hair wax you will find my recipe here See how this twist is created step by step in the full tutorial (Timestamp 02:28) 4.Double Side Twist with Shorter Fringe (Fake Bang Trick) This variation is ideal if you want a shorter fringe without cutting. By combining the double side twist with a smart fringe placement, you can: fake a shorter bang refresh your pixie instantly test a new look without scissors The fringe detail makes all the difference – see it in motion in the full Video (Timestamp 03:32) 5.The Twisted Crown The twisted crown wraps around the head like a soft halo. This style: looks elegant and elevated is perfect for events or special occasions works surprisingly well on short hair It’s one of the most requested looks in my community. The Twisted Crown – my all time favorite hairstyle with a twist- is shown step by step in the full Video (Timestamp 04:15) 6.Double Twist (Extra Hold & Texture) The double twist adds more grip and texture, making it perfect for: fine hair slippery hair long days where your style needs to last This look is practical, structured, and very wearable. This double twist creates a bold shape – explained in the full tutorial (Timestamp 05:13) 7. Fake Twist Braids (Front to Back) This style looks like boxer braids or French braids, but it’s actually done with twists instead of braiding. The fake twist braids run from the front hairline straight to the back, making them perfect for short hair where classic braids are often too difficult. This technique: creates the illusion of braided hair works even on very short pixie cuts adds structure and hold from front to back is faster and easier than real braids It’s ideal for sporty days, busy mornings, or when you want your hair completely out of your face. The illusion effect is easy to understand in motion- jump to this part here (Timestamp 05:57) 8. Fake Short Fringe (No Scissors Needed) This is the ultimate fake haircut trick. With this twist technique, you can: create a short fringe illusion test bangs without commitment refresh your look in seconds Perfect if you’re curious about bangs but not ready to cut. Watch this must know hair trick here (Timestamp 07:36) Final Thoughts: One Twist – Endless Short Hair Looks All of these hairstyles are built on the same simple twist technique. Once you understand the base, you can adapt it to your haircut, your mood, and your day — without cutting or heat. If you’re new to twisting, start with Twist #1 (The Base) and work your way through the styles that fit your hair length and lifestyle best. Watch the full step-by-step tutorial here Or jump directly to the timestamps linked above to revisit specific looks If you’d like more short hair tutorials, styling ideas, and honest product recommendations, you’ll find more guides here on the blog Quick Questions About Twist Hairstyles Does this work on very short pixie cuts?Yes — especially the base twist and the fake fringe variations. Do I need special tools?No. A bit of texture, small pins, and elastics are enough. Is this suitable for fine hair?Absolutely. Several twists are designed to add grip and structure.
How I Trim My Undercut at Home (3–4 mm) – The Easy Short Hair Guide
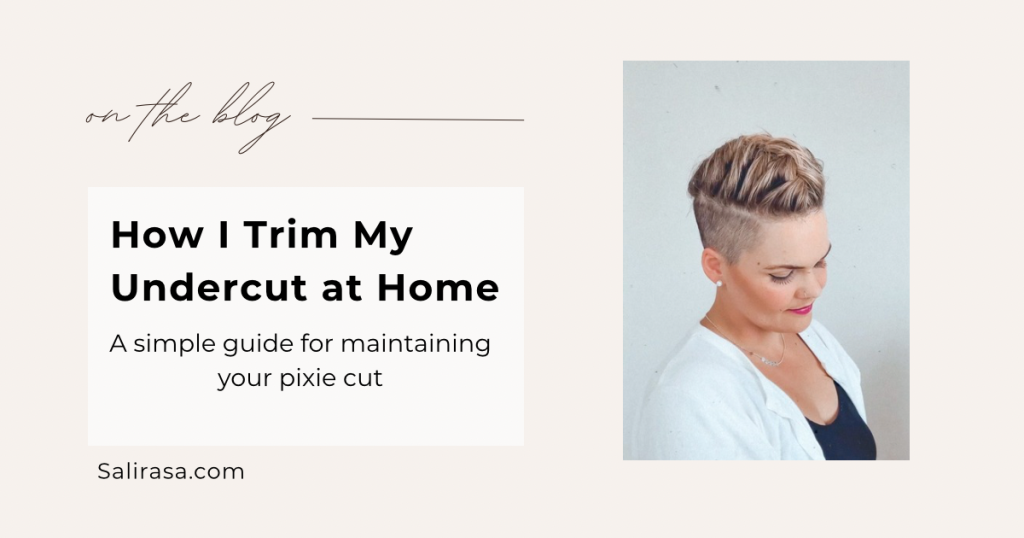
How to Trim an Undercut at Home (3-4mm)- Easy Pixie Hair This article contains affiliate links. If you purchase through these links, I may earn a small commission at no extra cost to you. Thank you for supporting my work. Short hair grows out fast, especially when you wear a pixie cut or an undercut. Between salon appointments, I keep my hairstyle fresh by trimming the undercut myself. My top layers are always cut by a professional, but the sides and the undercut are easy to maintain at home with the right tools and a clean method. This guide explains the exact technique I use in my videos. It works for beginners, creates even results and keeps the shape of your pixie cut sharp and intentional. Why I Trim My Undercut Myself Regular touch-ups make my haircut look fresh, structured and well-maintained. It saves time, reduces salon visits and keeps the style from growing out unevenly. A clean undercut gives short hair a defined silhouette and makes the overall look more polished. Tools I Use Silicone hair clips These grip the hair securely and prevent longer sections from slipping into the clipper. This is important to keep the top layers protected. Barber pads These flat pads act as a barrier under the longer hair. They ensure that the clipper never catches hair you want to keep. Hair clipper (Braun and Remington recommended) Any reliable clipper works, but the Braun and Remington model gives smooth, even results and is ideal for short-hair maintenance. Length setting: 3–4 mm I usually start with 4 mm for a soft finish and use 3 mm in areas where I want a sharper, more defined result. How I Trim My Undercut At Home ( Step-by-Step ) 1. Section and clip the top layers Lift all long sections and secure them tightly with silicone clips. Clean sectioning is crucial for a straight and safe trimming boundary. 2. Place a barber pad on the section Slide the pad directly at the transition between long hair and undercut. It protects the top layers throughout the process. ( Will post an updated Video on my Youtube soon and add it here) 3. Set the clipper to 3–4 mm Begin with 4 mm for an overall trim. Switch to 3 mm only where you want more contrast or a cleaner line. 4. Trim from bottom to top Work slowly and move the clipper against the direction of hair growth. Controlled, steady movements create the most even result. 5. Soften the edge Use only the tip of the clipper to gently blend the upper line. This avoids harsh lines while keeping the shape defined. 6. Check the back and sides with mirrors Use a hand mirror to review the symmetry and refine any uneven areas. Or a three way mirror – I have one in the bathroom. Why This Method Works A well-maintained undercut keeps the entire haircut in balance. Short hair relies on clean lines and shapes; regular trims ensure the pixie maintains structure and movement. This method is simple, repeatable and easy to learn, making it ideal for maintaining a sharp look between salon visits. Tools and Products I Recommend • Silicone hair clips • Barber pads • Braun hair clipper or Remington Hair clipper • Hand mirror or three way mirror • Styling powder or wax for finishing the undercut line Final Thoughts Short hair is easy to maintain once you understand the structure of your cut. Trimming your undercut at home is a practical way to keep your style fresh, neat and well-defined without frequent salon appointments. If you would like to see the process in action, I share real-time videos on Instagram and Facebook. If you style your short hair with a straightener afterwards, you might also like my details comparison of the ghd Gold, Platinum+ and Chronos stylers. My Amazon Shop (all my short hair favorites) If you want to see all the tools I personally use for trimming, styling and maintaining my pixie cut, you can find them in my Amazon Shop: 👉 Shop my favorites here if you are located in the US 👉 Shop my favorites here if you are from the UK 👉 Hier findest du meine Favoriten wenn du in Deutschland wohnst